
Yunus Emre
Software Engineer
Sharepoint SPFx Webpart Creation - React
SPFx (SharePoint Framework) is a framework developed by Microsoft and designed to facilitate customization and application development in SharePoint. This framework can be used to create web parts, page extensions and Microsoft Teams applications. Now let's move on to sharepoint SPFX webpart creation steps.
SPFx Webpart Creation
SPFx offers developers a modern experience and provides the ability to use JavaScript, TypeScript, HTML, CSS and other popular web technologies. It also provides easy access to SharePoint's features and data.
Essentials needed to create a webpart;
- A modern browser (Edge, Firefox, Chrome)
- Node.Js
- Gulp
- Yeoman
- Compiler (Visual Studio Code)
First, let's come to the editing screen of the application we opened in node.js. If it is not installed on your computer, you can make the necessary installations via the link. If it is already installed, you can check the version by typing the following code in the terminal.
node --versionI am using v16.20.1. Very low or high versions can create incompatibility.
Let's install gulp, yeoman and microsoft generator with the following single line code. At this stage, it is useful to open the terminal with admin authorization. You can install them individually, but I preferred batch installation.
npm install gulp-cli yo @microsoft/generator-sharepoint --globalAfter the relevant installations, we can create a webpart. We write the following code in our terminal.
yo @microsoft/sharepointThen it will ask for solution name information. After entering this information, I make a selection because I will create a "WebPart". I am asked to enter a WebPart name. I type "MyWebPart" for testing purposes. After this process, I am asked for the template I want to use. I choose "React" here. After this selection, the necessary installations will be made. This process may take a little longer.
When the installation process is finished, the certificate process is done with the code below.
gulp trust-dev-certNow we can view the webpart we have created. We can view it by running the following code in the created project directory.
gulp serveIf the link to the page to be displayed is incorrect, go to the created project directory. Find the "serve.json" file in the config file. Replace the "initialPage" part in this file with your own tenant. Then type "gulp serve" again in the terminal and display the webpart.
Note: Since you are logged in to your tenant, you will be asked to log in with your microsoft account at the viewing stage.
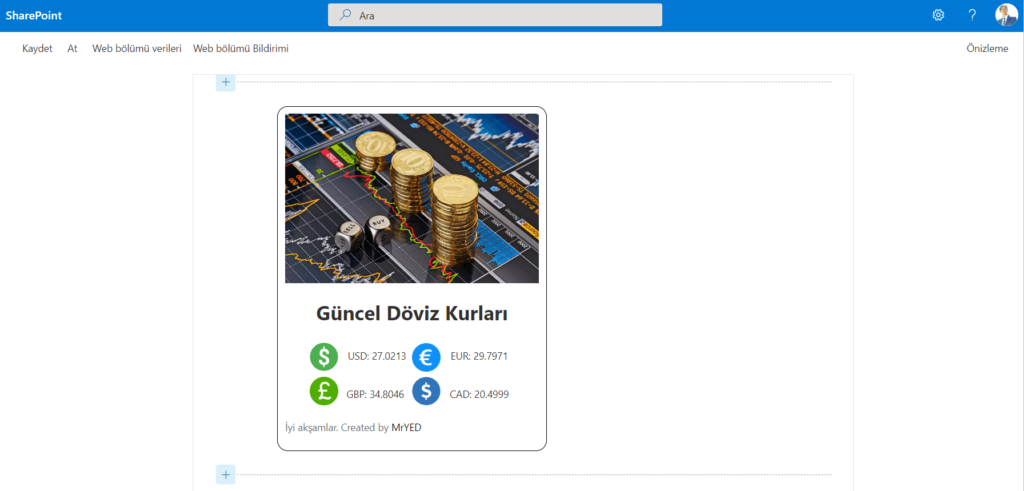
In the window that opens to upload the webpart to the page, click on the webpart name you have created by pressing the "+" icon. You will be presented with a standard template. This template comes from the ".tsx" file at "src\webparts\{webpart name}\components". You can change your webpart by editing this file.
SPFx Webpart Publishing
Before releasing an application, we create a "debug" version to make it ready for release.
gulp bundle --shipAfter creating the "Debug" version, we create the publishing package. SPFx applications are published with ".sppkg" extension. We create this package with the following code.
gulp package-solution --shipThis command compresses the components in the project and creates a ".sppkg" file under the "sharepoint/solution" folder. You can publish this file to users from the sharepoint admin center.
That's it for SPFx webpart creation and publishing. See you in the next article content...
2 Comments